Thursday 21 May 2015

Openshift users have this major disadvantage. They have to choose between scaleability and phpMyAdmin. Once you make your app scalable, you won't be able to install phpMyAdmin cartridge and and once you install phpMyAdmin, you won't be able to make the app scalable.

But what developers have at their advantage is that phpMyAdmin is opensource and free to download. So installing phpMyAdmin on a scalable OpenShift app is now a matter of a few steps : downloading, extracting, configuring and uploading.

Pre-Requisites:

Before starting, I assume the following:

  1. that you have created an app at openshift.
  2. that you have installed all required tools ie. GIT-SCM, Ruby 1.8.7 or higher, rhc tools, etc as described here. 
  3. that you know how to modify an openshift app.


Step 1:

Clone your app source code to a local folder
$ git clone <git_url> <directory to create>

Step 2:

If you are a fan of phpMyAdmin, I don't have to tell you that you can download it here.

Step 3:

Now extract it to the root of your local code repository. If you want to be a little possessive about your phpMyAdmin URL, change the name of the folder from "phpmyadmin" to something else, say "mypma". Remember this folder name.

Step 4:

  1. Just open the folder you just copied and look for the file config.sample.inc.php. Make a copy of the file and rename it to config.inc.php. 
  2. Just before the first configuration option you find, add the following lines:
define('DB_HOST',getenv('OPENSHIFT_MYSQL_DB_HOST')); define('DB_PORT',getenv('OPENSHIFT_MYSQL_DB_PORT'));  define('DB_NAME',getenv('OPENSHIFT_GEAR_NAME'));
  1. Look for the line that contains $cfg['blowfish_secret'] = ''; and change the value to some random text.
  2. Make sure the lines that contain the following are either absent or commented out.
    1.  $cfg['Servers'][$i]['user']
    2.  $cfg['Servers'][$i]['password']
  3. Make sure $cfg['Servers'][$i]['AllowNoPassword'] is set to false.
  4. For added security, force SSL on phpMyAdmin.
  5. $cfg['ForceSSL'] = true;
  6. If you want to make more customizations, see here.
  7. Save config.inc.php.


Step 5:

You can now push the code to your openshift gear using the following commands after making changes to the code in rest of your app/project if you want.
$ git add .
$ git commit -m "Added phpMyAdmin"
$ git push

That's all folks, You just have to log on to https://<app_name>-<domain>.rhcloud.com/<pma_folder_name>, enter your database login username and password (provided by openshift at the time of creating your app) and once again a treasure lies before you.

I'll sign off here. Please add your feedback below if you liked what you read. 

Tuesday 9 July 2013

Good day all of you !!!
As promised I am back with the final lessons on Installing phpMyAdmin on Google App Engine. According to what I mentioned in Part I, by now you should have got your application whitelisted for PHP deployment. If you haven't done it, please do it now and meanwhile if you haven't installed phpMyAdmin on local GAE, do it now.

phpMyAdmin on Google App Engine
 

Part II (Deployment)

Install phpMyAdmin on local GAE

Let me repeat again for emphasis, Please First Install phpMyAdmin on local GAE setup. Follow Part I of this tutorial for step-by-step procedure.  

Create a CloudSQL SuperAdmin

The next most important important thing we have to do is to create a duplicate of MySQL's root user called admin. As in the local installation, this user will be the username we'll use to log into phpMyAdmin. Choose a password strong enough to be unpredictable by others and memorable enough to be unforgettable by you.

Open the CloudSQL prompt.

  1. Start your browser and navigate to Google APIs Console.
  2. In the left pane select a PHP/CloudSQL enabled project to which you wish to deploy phpMyAdmin.
  3. In the left pane click on Google Cloud SQL.
  4. Now, in the dashboard pane select the SQL Prompt tab.
Google Cloud SQL Prompt
In the CloudSQL prompt, execute the following queries one by one:
CREATE USER 'admin'@'%' IDENTIFIED BY '<password>'; -- Replace <password> with your own password
GRANT ALL PRIVILEGES ON * . * TO 'admin'@'%' IDENTIFIED BY '<password>' WITH GRANT OPTION MAX_QUERIES_PER_HOUR 0 MAX_CONNECTIONS_PER_HOUR 0 MAX_UPDATES_PER_HOUR 0 MAX_USER_CONNECTIONS 0 ;

CloudSQL already provides a root that has all the needed privileges, why not set a password on it instead of creating another admin user?
Go through this page of Cloud SQL official docs, if you add a password to the root MySQL user, the APIs Console Interface will lose some functionality. Most importantly, you'll lose access to SQL prompt. If in future, you ever mess up things or forget your admin password, SQL Prompt is your only recovery option.

Configure CloudSQL in config.inc.php

If you remember, in the local installation we configured a localhost. We'll just configure another server in it to accommodate CloudSQL.
Open project_path/config.inc.php and at the end (just before the line containing ?>) add the below lines:

/* Server: CloudSQL [2] */
$i++;
$cfg['Servers'][$i]['AllowNoPassword'] = false;
$cfg['Servers'][$i]['verbose'] = 'CloudSQL';
$cfg['Servers'][$i]['host'] = ':/cloudsql/govt-jobs-india:app';
$cfg['Servers'][$i]['port'] = '';
$cfg['Servers'][$i]['socket'] = '';
$cfg['Servers'][$i]['connect_type'] = 'tcp';
$cfg['Servers'][$i]['extension'] = 'mysql';
$cfg['Servers'][$i]['auth_type'] = 'cookie';
$cfg['Servers'][$i]['user'] = 'root';
$cfg['Servers'][$i]['password'] = '';
$cfg['Servers'][$i]['pmadb'] = 'phpmyadmin';
$cfg['Servers'][$i]['controluser'] = 'phpmyadmin';
$cfg['Servers'][$i]['controlpass'] = '
<control_passsword>';
$cfg['Servers'][$i]['bookmarktable'] = 'pma__bookmark';
$cfg['Servers'][$i]['relation'] = 'pma__relation';
$cfg['Servers'][$i]['userconfig'] = 'pma__userconfig';
$cfg['Servers'][$i]['table_info'] = 'pma__table_info';
$cfg['Servers'][$i]['column_info'] = 'pma__column_info';
$cfg['Servers'][$i]['history'] = 'pma__history';
$cfg['Servers'][$i]['recent'] = 'pma__recent';
$cfg['Servers'][$i]['table_uiprefs'] = 'pma__table_uiprefs';
$cfg['Servers'][$i]['tracking'] = 'pma__tracking';
$cfg['Servers'][$i]['table_coords'] = 'pma__table_coords';
$cfg['Servers'][$i]['pdf_pages'] = 'pma__pdf_pages';
$cfg['Servers'][$i]['designer_coords'] = 'pma__designer_coords';

Finally, let's deploy

Like we did for starting dev_appserver.py, let us create an executable file that deploys our application on a double-click.  Create a shell script update.sh (if you are on linux) or a DOS batch file update.bat  in project_path  and fill it with the command below and save it.

sdk_path/appcfg.py update -R .

If you're on linux, make it executable

$ chmod 755 update.sh

Creating this file will save you time needed to type the commands everytime. Now run the file to start deployment. You will be prompted for email and password. Enter your Google account email and password respectively and wait for sometime (When deploying for the first time, this may take more than a few minutes depending on your internet).If your deployment is successful, in the terminal/console window, you'll see something similar to:

02:32 PM Host: appengine.google.com
02:32 PM Application: app-id; version: pma
02:32 PM Starting update of app: app-id, version: pma
02:32 PM Getting current resource limits.
Email: <google_username>
Password for tabrez.tk: <google_password>
02:32 PM Scanning files on local disk.
02:32 PM Scanned 500 files.
02:32 PM Scanned 1000 files.
02:32 PM Cloning 578 static files.
02:33 PM Cloning 1080 application files.
02:33 AM Uploading 41 files and blobs.
02:33 AM Uploaded 41 files and blobs.
02:33 PM Compilation starting.
02:34 PM Compilation completed.
02:34 PM Starting deployment.
02:34 PM Checking if deployment succeeded.
02:34 PM Deployment successful.
02:34 PM Checking if updated app version is serving.
02:34 PM Completed update of app: app-id, version: pma

Log into phpMyAdmin

Start your browser and log on to https://pma-dot-app-id.appspot.com. Yes it is pma-dot-app-id.appspot.com

You may also access phpMyAdmin at https://pma.app-id.appspot.com but good browsers may not like it
Since SSL certificate at appspot.com is valid only for *.appspot.com and pma.app-id.appspot.com belongs to the family *.*.appspot.com, good browsers will treat this as eavesdropping and may throw a "This connection is untrusted" error and refuse to proceed.


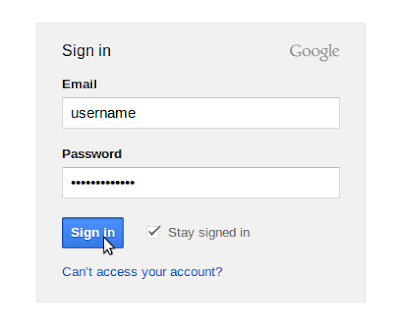
You will now be taken Google's Login Page (If you are already logged into your google account, the login screen may not appear)


First login screen

You will now be presented with phpMyAdmin login screen. Enter admin in the Username field, enter the password you have set and click "Go". 
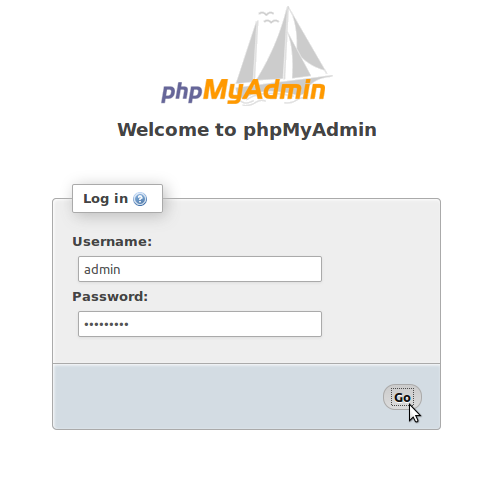
Second login screen

This will be your normal procedure to log into phpMyAdmin. You have to first log into Google, then separately into phpMyAdmin. Thus your old friend phpMyAdmin is now under two layers of security.

If all went well, you should now be logged into phpMyAdmin.

Finish Configuration

This step is almost copied from local installation except that you have already deployed config.inc.php and you cannot edit it now. So, you should be ready with <control_passsword> that you added in config.inc.php.


  1. Create control user:
    In phpMyAdmin, navigate to Users >> Add User. Create a user phpmyadmin with a password <control_password> and no global privileges with "Create database with same name and grant all privileges" checked (ticked).
  2. Create storage database and tables:
    Open project_path/examples/create_tables.sql. Copy all content to phpMyAdmin's SQL utility at Databases >> phpmyadmin >> SQL and execute them.

You're done

With this, you've succcessfully installed and deployed phpMyAdmin on Google App Engine. You now have a plethora of phpMyAdmin's features before you.

I'll sign off now. If you liked this tutorial or if you have anything to say, don't forget to comment below.

Take care...
Google App Engine (GAE), which is known for its scalability and performance, was criticised for not supporting PHP since its first day of existence. Though the enthusiasts came out with different solutions like Quercus/Java out of their love for the language, they were always waiting for the official support. And here it is. Google, unable to ignore the Majority Web Developers' long standing demand for PHP runtime on their platform has finally announced official support for PHP earlier in this year. Gone is forever gone. Let us now forget the history and together relish the PHP experience on GAE. I mean: scroll down further and read the tutorial.

Prerequisites:

Before starting this tutorial, I assume the following:
  1. that you know the nitty-gritty of PHP and MySQL.
  2. that you have at least gone through the official documentation of GAE (PHP).
  3. that you have signed up for Google App Engine and Cloud SQL.
  4. that you have created your Google Cloud Project. For the rest of this tutorial, the Project ID you chose while creating your project, will be called app-id.
  5. that in your project, you have created a CloudSQL instance with access to app-idFor the rest of this tutorial, the Instance ID you chose while creating your project, will be called instance-id. 
  6. that your application is whitelisted for PHP deployment. If not, submit your app for whitelisting now. While it is whitelisted, you can follow the Part I of this tutorial.
  7. that on your system, you have installed:
phpMyAdmin on Google App Engine

Part I (Local Installation)

Download phpMyAdmin

PHP/MySQL developers have various reasons to start developing only after installing this masterpiece which combines PHP, MySQL and the richness of GUI. So, without wasting more time, download this piece of treasure now.

Create your project directory and stuff it with phpMyAdmin

Create a folder in which we're going to place all our code. We'll call this path project_path for the rest of this tutorial.  Extract the downloaded archive to the folder project_path/phpmyadmin.

Complete App Engine formalities

Before starting the local GAE server, we must transform our  project into a  GAE  project. If you've gone through  the official docs, you must have realised that a project is not a GAE-PHP project unless it contains files named:
  1. app.yaml
  2. php.ini
  1. app.yaml

    Create a file app.yaml in project_path and fill it with the code below:
    application: app-id
    version: pma
    runtime: php
    api_version: 1
    
    handlers:
    - url: /(.+\.php)
      script: phpmyadmin/\1
      secure: always
      login: admin
    
    - url: /(.+\.php)\?.+$
      script: phpmyadmin/\1
      secure: always
      login: admin
    
    - url: /
      script: phpmyadmin/index.php
      secure: always
      login: admin
    
    - url: /(.*\.(htm$|html$|css$|js$|ico$|jpg$|png$|gif$))
      static_files: phpmyadmin/\1
      upload: phpmyadmin/(.*\.(htm$|html$|css$|js$|ico$|jpg$|png$|gif$))
      secure: always
      application_readable: true
      login: admin
  2. php.ini

    If you had gone through the official docs, you would have done this already. If not, then do it now. Create a file php.ini  inproject_path and fill it with the code below:
    google_app_engine.enable_functions = "php_sapi_name, gc_enabled"

Start the servers

There must be two servers running in our setup
  1. Local GAE server (dev_appserver.py)
  2. MySQL (mysqld)
  1. Starting local GAE server
    The official docs already make a mention about this, but let me innovate it a little. In project_pathcreate a shell scriptstart.sh if you are on linux and fill it with the code below
    sdk_path/dev_appserver.py . --php_executable_path=path_to_php_cgi/php-cgi
    and run the below command on terminal to make it executable
    $ chmod 755 project_path/start.sh
    Or if you are on Windows, create a DOS batch file start.bat in project_path and place the following command in it.
    sdk_path/dev_appserver.py . --php_executable_path=path_to_php_cgi/php-cgi.exe
    Double-click the file to start the server. From now on, instead of typing the whole command, you just have to do this to start the server. If the server starts successfully, the terminal/console window will show something similar to:
    INFO     2013-07-08 17:38:05,215 api_server.py:153] Starting API server at: http://localhost:37260
    INFO     2013-07-08 17:38:05,243 dispatcher.py:164] Starting server "default" running at: http://localhost:8080
    INFO     2013-07-08 17:38:05,251 admin_server.py:117] Starting admin server at: http://localhost:8000
  2. Starting MySQL server
    Since I assume that you know how to start/stop MySQL server, I leave this to you. But if you still need help, the MySQL documentation is always at your rescue.

Create a MySQL SuperAdmin

You need a username and password to log into your phpMyAdmin installation, don't you? Then let us create a MySQL user with all possible privileges. Open MySQL prompt as root on the command line:
mysql -u root -p
and run the following queries, of course after replacing <password> with your own password :
CREATE USER 'admin'@'%' IDENTIFIED BY '<password>';
GRANT ALL PRIVILEGES ON * . * TO 'admin'@'%' IDENTIFIED BY '<password>' WITH GRANT OPTION MAX_QUERIES_PER_HOUR 0 MAX_CONNECTIONS_PER_HOUR 0 MAX_UPDATES_PER_HOUR 0 MAX_USER_CONNECTIONS 0 ;
When there is already a user called root that has all the needed privileges, why do we need admin user?
There are a few reasons for this:
  1. Some MySQL installations have root user with blank password. I'll not recommend you to use phpMyAdmin with a blank password though you can always configure it in that manner.
  2. If you go through this page of Cloud SQL official docs, you'll find that if you add a password to the rootMySQL user, the APIs Console Interface will lose some functionality, including import and export capabilities, and the SQL prompt. Although this is significant only when we deploy our application to GAE, still let us play safe and be in sync with them. 
But there's no reason to worry. phpMyAdmin doesn't accept logins with blank passwords unless you ask it to (see here).

Finish Configuration of phpMyAdmin

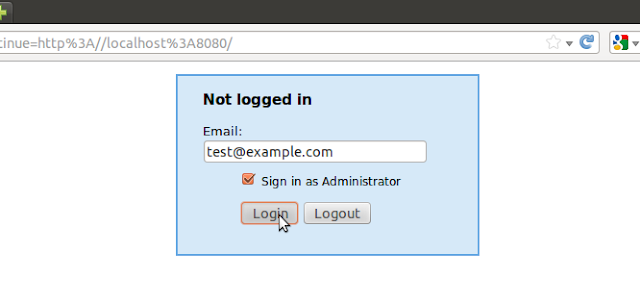
phpMyAdmin is almost installed on your localhost. Start your browser and navigate to http://localhost:8080/. You will be presented with a login screen. Enter an arbitrary email, check "Sign in as Administrator" and click Login.
First login screen
You will now be presented with phpMyAdmin login screen. Enter admin in the Username field, enter the password you have set and click "Go".
Second login screen
You should feel secure about the fact that your phpMyadmin is protected by two layers of password. If all went well, you should now be logged into phpMyAdmin. The superabundant features that phpMyAdmin offers are all yours now. But wait, configuration is not finished yet. phpMyAdmin is yet not able to offer its feature called Configuration Storage. For phpMyAdmin to deliver these features to you, it needs a database with a few tables and a control user with all privileges on that database. Let's give it now:
  1. Create control user:  In phpMyAdmin, navigate to Users >> Add User. Create a user phpmyadmin with a password <control_password> and no global privileges with "Create database with same name and grant all privileges" checked (ticked).
  2. Create storage database and tables: In project_path/examples, there is a file called create_tables.sql. Open it, copy all content to phpMyAdmin's SQLutility at Databases >> phpmyadmin >> SQL and execute them.
  3. Update this configuration in phpMyAdmin: In project_path, create a file config.inc.php, and place in it the following code:       
    <?php
    $cfg['blowfish_secret'] = 'Place a random pass phrase here. This pass phrase is used for cookie authentication.';
    $cfg['QueryHistoryDB'] = true;
    $cfg['DefaultLang'] = 'en';
    $cfg['ServerDefault'] = 0;
    
    /* Servers configuration */
    $i = 0;
    
    /* Server: localhost [1] */
    $i++;
    $cfg['Servers'][$i]['AllowNoPassword'] = false;
    $cfg['Servers'][$i]['verbose'] = 'localhost';
    $cfg['Servers'][$i]['host'] = 'localhost';
    $cfg['Servers'][$i]['port'] = '';
    $cfg['Servers'][$i]['socket'] = '';
    $cfg['Servers'][$i]['connect_type'] = 'tcp';
    $cfg['Servers'][$i]['extension'] = 'mysqli';
    $cfg['Servers'][$i]['auth_type'] = 'cookie';
    $cfg['Servers'][$i]['pmadb'] = 'phpmyadmin';
    $cfg['Servers'][$i]['controluser'] = 'phpmyadmin';
    $cfg['Servers'][$i]['controlpass'] = '<control_passsword>';
    $cfg['Servers'][$i]['bookmarktable'] = 'pma__bookmark';
    $cfg['Servers'][$i]['relation'] = 'pma__relation';
    $cfg['Servers'][$i]['userconfig'] = 'pma__userconfig';
    $cfg['Servers'][$i]['table_info'] = 'pma__table_info';
    $cfg['Servers'][$i]['column_info'] = 'pma__column_info';
    $cfg['Servers'][$i]['history'] = 'pma__history';
    $cfg['Servers'][$i]['recent'] = 'pma__recent';
    $cfg['Servers'][$i]['table_uiprefs'] = 'pma__table_uiprefs';
    $cfg['Servers'][$i]['tracking'] = 'pma__tracking';
    $cfg['Servers'][$i]['table_coords'] = 'pma__table_coords';
    $cfg['Servers'][$i]['pdf_pages'] = 'pma__pdf_pages';
    $cfg['Servers'][$i]['designer_coords'] = 'pma__designer_coords';
    /* End of servers configuration */
    ?>

You're done

With this, you've succcessfully installed phpMyAdmin on GAE local installation. I'll conclude the Part I of this tutorial here. Part II will deal with deploying phpMyAdmin on http://pma.app-id.appspot.com. Any comments/suggestions will be highly gratifying.
Take care...

Install phpMyAdmin on Google App Engine - Part 2

Subscribe to RSS Feed Follow me on Twitter!